WELCOME TO THE WORLD OF EYELASHES

Step-by-Step Guide on How to Do Lash Lift and Tint at Home *
|
|
Time to read 5 min
My Cart
Your Cart Is Empty
Continue shopping|
|
Time to read 5 min
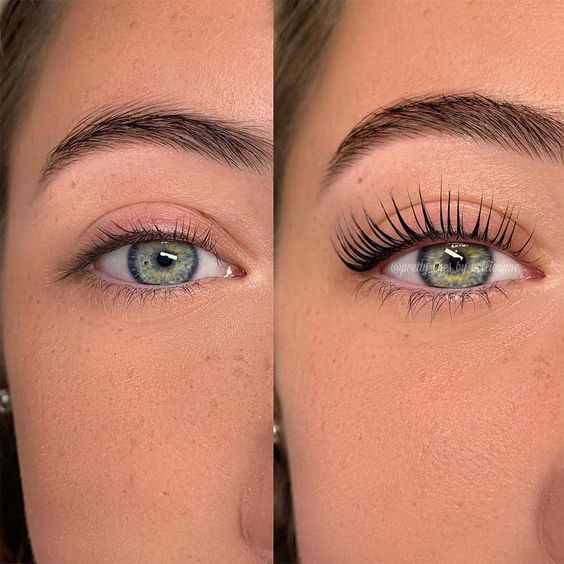
If you’re tired of using mascara every day to enhance your eyelashes or you simply want to wake up with beautifully curled and tinted lashes, then a lash lifting and tint at home might be the perfect solution for you. Not only can this DIY beauty treatment save you time and money, but it can also give you stunning results when done correctly. In this comprehensive guide, we will take you through the step-by-step process of achieving gorgeous lifted and tinted lashes from the comfort of your own home.
A lash lift and tint are beauty procedures designed to give your lashes a natural-looking curl and a darker, more defined color. While these treatments are typically performed at a salon, you can achieve similar results at home with the right tools and techniques. In this guide, we will walk you through the entire process, ensuring you get beautiful lashes that make your eyes pop.
Lash lifting and tinting are two separate procedures that are often done together for a dramatic effect. A lash lift involves curling your lashes at the root to create a lifted appearance that lasts for weeks. On the other hand, lash tinting involves colouring your lashes, making them look fuller and more noticeable without the need for mascara.
Doing a lash lift and tint at home offers several advantages. It’s cost-effective, allows you to customize the results to your liking, and provides the convenience of not having to book salon appointments. Plus, with a little practice, you can achieve professional-looking results in the comfort of your own home.
Before you begin, gather the following items:

Start by preparing your work area. Ensure you have good lighting and a stable surface to work on. Lay out all your tools and products within easy reach. Wash your hands thoroughly and put on your gloves to maintain hygiene throughout the process.
Using a gentle oil-free cleanser, remove any makeup, dirt, or oil from your lashes. Ensure they are completely clean and dry before moving on to the next steps.
Either use medical tape or a cover pad from your kit. If you also cover the upper lid with micropore tape, it will be easier to remove the silicone pad later.
Now choose the right silicone pad (if necessary, cut it to the correct size) and apply glue to the curved side of it, wait 2-3 min., and then place it very close to the eyelash line. Repeat for the other eye. Tip: small size = more curl, big size = less curl. Find out here which size of silicon pads for your eyelash lift is best.
Apply lash lifting glue to the front of the lash lift pads. Tip: don’t use too much glue, better be patient and wait 2-3 minutes for the next step.
Start lifting the eyelashes using the Y-applicator, it’s best to lift them one by one from the root onto the pad until all lashes are attached. Make sure they all are straight aligned and nicely positioned next to each other. Tip: To correct one lash, just give a drop of glue to it, so you can solve and separate it again.
Apply the Perm Lotion directly from the sachet or with a micro brush, which is included in your kit. Make sure to soak only the bottom half of the eyelashes from the root to the middle, avoid the tips. Cover with cling film and leave on for only 6-7 minutes for thick eyelashes or 4 to 5 minutes for thin eyelashes. Then remove the Perm Lotion with the Y-applicator or a cotton swab and some water.
Repeat step 6, but now using the Fixing Lotion. If you use a micro brush instead of a sachet, make sure you always use a fresh one so that the lotions do not get mixed.
Use the Cleanser to remove any residue with the Y-applicator.
After completing the lash lift, it’s time to tint your lashes. Apply a small amount of tint to the lashes, ensuring they are evenly coated. Be cautious not to get the tint in your eyes. Leave the tint on for the recommended time, as specified in your lash tint kit.
Remove the silicone pad carefully with some water and a cotton bud and comb the eyelashes with a mascara brush.
Use the conditioning solution included in your lash lift kit or a good sealer to nourish and hydrate your lashes. This step helps maintain the lift and keeps your lashes healthy.
Once you’ve completed all the previous steps, use a clean spoolie brush to comb through your lashes, separating them and ensuring they are perfectly curled and tinted. Allow your lashes to air dry naturally.
Aftercare is essential to maintain the results of your lash lifting. Avoid getting your lashes wet for the first 24 hours, and be gentle when removing makeup around the eye area. Use a lash serum to promote lash health and longevity.
With this step-by-step guide, you can achieve salon-quality lash lifting results in the comfort of your own home. Not only will you save time and money, but you’ll also enjoy the convenience of waking up to beautifully curled and tinted lashes. Say goodbye to mascara and hello to effortlessly stunning eyes!

